Procure-to-Pay, often called P2P, is the process that starts when a business identifies the need to purchase goods or services and ends when the vendor is paid and the transaction is reflected in the general ledger.
In NetSuite, this process can be managed through connected procurement and accounts payable transactions, helping teams move from vendor setup to purchase requisition, purchase order, item receipt, vendor bill, payment, and GL impact within the same ERP environment.
This guide walks through the basic NetSuite Procure-to-Pay setup and business flow. The intent is to keep the steps practical and easy to follow while adding a little more context around why each step matters.
What is Procure to Pay?
Procure-to-Pay is the business process used to request, purchase, receive, invoice, pay for, and account for goods or services. It typically involves procurement, finance, operations, warehouse, and accounting teams.
When the process is handled manually, businesses often face multi department dependency, approval delays, duplicate orders & payments, missing documentation, inconsistent purchase controls, and limited visibility into spending. A properly configured NetSuite P2P process helps reduce these gaps by connecting purchasing and payables transactions in one system.
Why Procure to Pay is Important
Procure to Pay provides control and visibility over the entire lifecycle of a purchasing transaction. It helps teams understand what was requested, who approved it, which vendor fulfilled it, whether the goods were received, and how the payment affected accounting.
For finance teams, a well-managed P2P process supports cleaner payables, better audit trails, and more reliable financial reporting. For procurement teams, it helps standardize vendor buying and reduce informal or off-process purchasing. For operations teams, it improves visibility into receipts and open orders. For inventory team it gives insight about upcoming inventory location wise.
Steps to Set Up Procure to Pay in NetSuite
The basic NetSuite Procure-to-Pay process can be understood through eight practical steps:
- Create a Vendor
- Create an item based on inventory, service or non-inventory requirements
- Create a requisition with the vendor and item
- Create or convert the purchase order from the requisition
- Create a receipt for the purchase order
- Create an invoice or vendor bill for the receipt
- Make payment for the invoice
- Review the General Ledger / GL Impact
1. Creating a Vendor
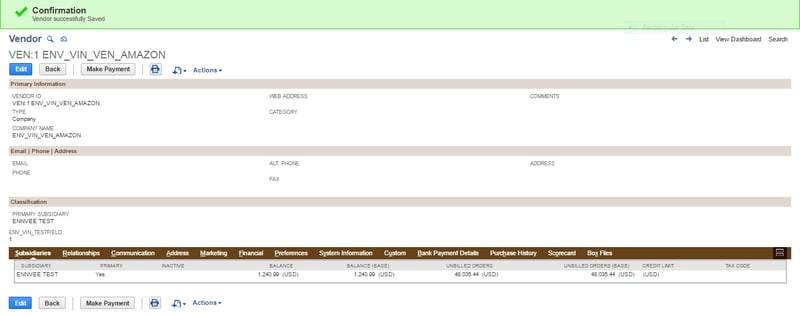
Before starting the Procure-to-Pay process, the vendor record should be created in NetSuite. Vendor master data is important because it controls supplier details, payment terms, tax information, banking details, and other information used during purchasing and payments.
To create a vendor, go to Lists > Relationships > Vendors > New
At minimum, the Company Name field is required. The remaining fields can be used to capture address, contact, payment, tax, and other vendor details. For stronger P2P control, teams should also review vendor category, subsidiary, currency, payment terms, and approval requirements where applicable.
2. Create an Item Based on Inventory or Non-Inventory Need
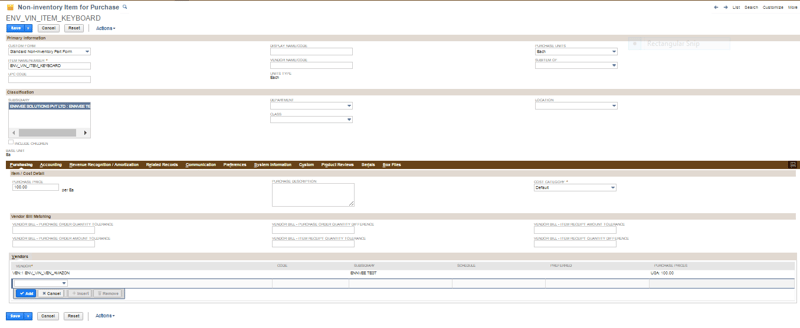
After the vendor is created, the next step is to create the item that will be purchased. In NetSuite, items can be inventory, non-inventory, service, expense-related, or other item types depending on the business scenario.
To create a non-inventory purchase item, go to Lists > Accounting > Items > New
Common mandatory fields include Item Name/Number, Unit Of Measure, optionally preferred Vendor and Tax Schedule. When the vendor is selected on the item record, NetSuite can automatically populate the vendor when that item is used in a requisition or purchase transaction, depending on configuration.
3. Create a Requisition with the Vendor and Item
A requisition is an internal request for goods or services. It allows employees or business users to request a purchase before a purchase order is created.
To create a requisition, go to Transactions > Purchases > Enter Requisition > New
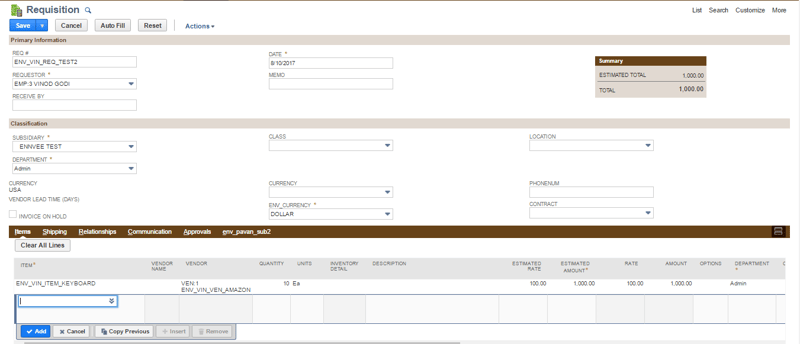
Typical mandatory fields include Requestor, Date, Item, and Department. The requisition can then be submitted for approval based on the organization’s workflow. Once approved, the requisition can move forward into the purchasing process.
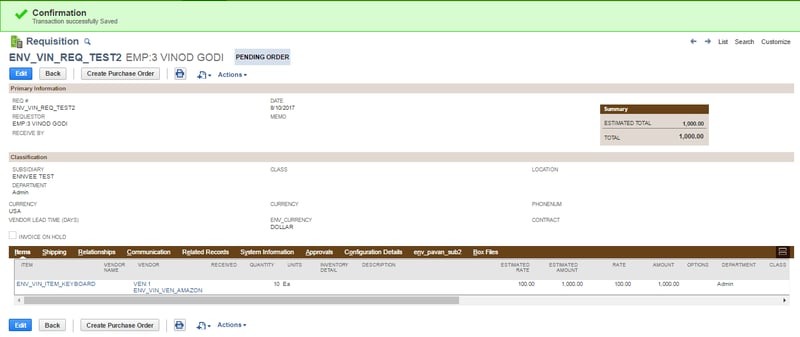
Next, an order requisition needs to be created for the particular requisition:
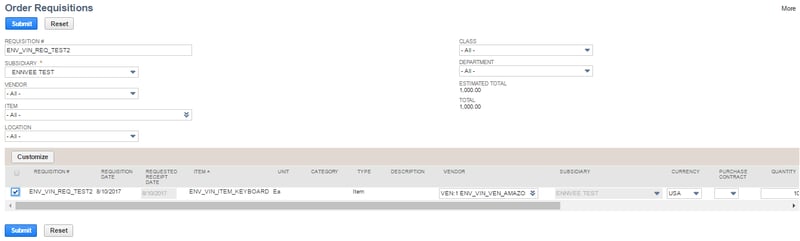
Click Submit. Once the order requisition is submitted the purchase order will be processed:

Click OK. The status will change to Started.
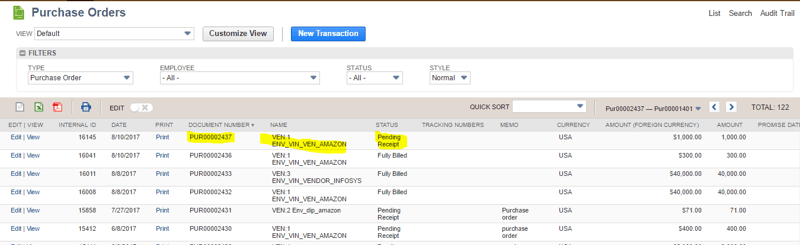
4. Purchase Order
A purchase order is the formal purchasing document sent to the vendor. It confirms what is being purchased, from whom, at what quantity and price, and under which terms.
The purchase order can be created from the approved requisition. To review purchase orders, go to Transactions > Purchase > Enter Purchase Order > New
Click Edit on the purchase order to automatically populate the field with information.
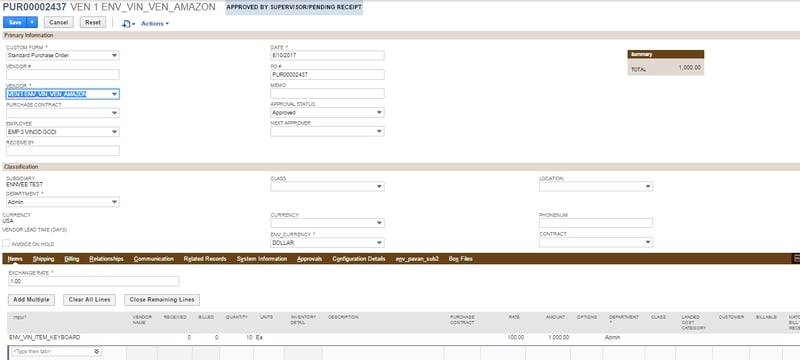
The purchase order will carry relevant information from the requisition (if generated from requisition), vendor and item setup. Once the PO is approved and issued, it will typically move into a pending receipt status until the goods or services are received.
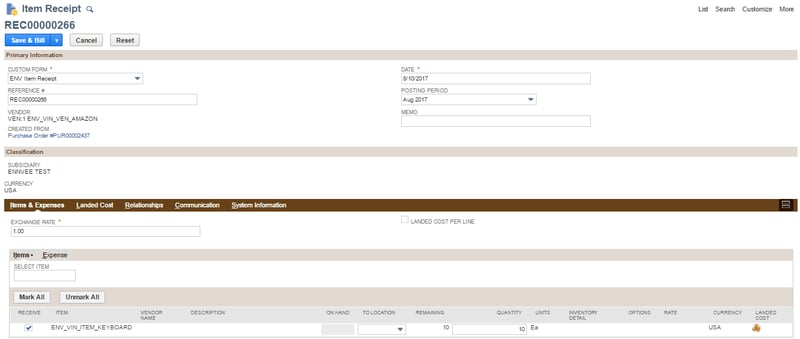
5. Create a Receipt for the Purchase Order
The receiving step confirms that the ordered goods or services have been received. This is important because organizations should not pay vendor bills without confirming receipt where receipt is required.
For inventory items, item receipt updates receiving and inventory-related records. For non-inventory or service items, the receipt process may depend on how the organization has configured purchasing and receiving controls.
This step creates the operational link between what was ordered and what was actually received.
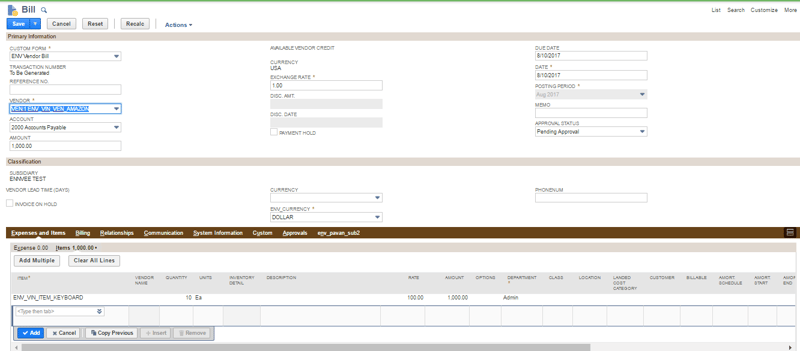
6. Create an Invoice or Vendor Bill for the Receipt
After goods or services are received, the vendor invoice or vendor bill can be created in NetSuite. The bill should align with the purchase order and receipt details.
In more controlled P2P environments, this is where 2 way or 3 way matching rules become important. NetSuite can support matching between the purchase order, receipt, and bill so that discrepancies can be identified before payment is processed.
This helps finance teams catch issues such as quantity mismatches, price differences, duplicate bills, or invoices submitted before receipt.
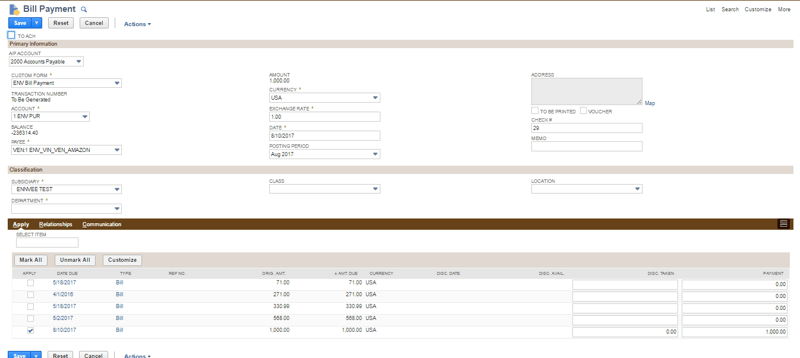
7. Make Payment for the Invoice
Once the vendor bill is reviewed and approved, payment can be processed to the vendor. NetSuite supports different payment approaches depending on configuration, banking setup, and business requirements.
Payment should follow the organization’s approval and segregation-of-duties policies. For stronger control, teams should review whether the person creating or approving the payment should be separate from the person creating the vendor or bill.
8. Review General Ledger / GL Impact
The General Ledger records the accounting impact of business transactions. In NetSuite, GL Impact helps users see how a transaction affects accounts.
You can access GL Impact from the relevant transaction by going to Actions > GL Impact, depending on role permissions and transaction type.
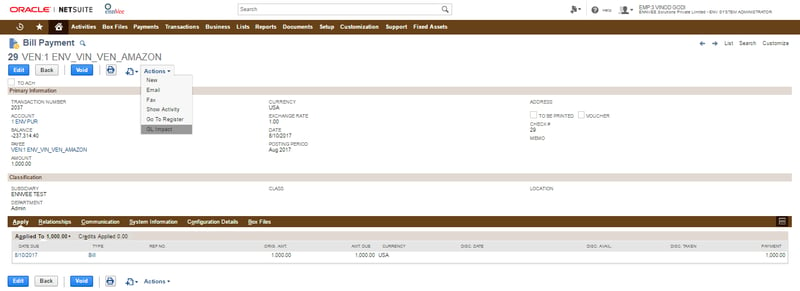
Reviewing GL Impact is useful because it confirms whether the procurement transaction is posting to the expected accounts, departments, classes, locations, or subsidiaries.
The status of the process will be received in GL Impact:

Practical Checklist Before Publishing or Configuring
Before enabling or refining a NetSuite P2P process, confirm that the following are clear: vendor master data standards, item setup approach, purchase approval rules, receiving requirements, bill approval process, payment controls, GL account mapping, and reporting needs.
For growing organizations, the basic process can be expanded with approval workflows, three-way matching, vendor onboarding controls, Bill Capture, Asset Procurement, EFT or Cheque payments, Purchase Contracts, Blanket Purchase Orders, RFQs, Preferred Vendor Pricing, Vendor Portals SuiteAnalytics reporting, and integrations with banking or procurement tools.
Conclusion
NetSuite Procure-to-Pay connects purchasing, inventory and accounts payable activity into a structured process. When vendor records, items, requisitions, purchase orders, receipts, bills, payments, and GL impact are managed correctly, organizations gain better visibility and control over spend.
The most important point is to start with a clean, practical process. Once the core P2P flow is stable, teams can gradually add approval routing, automation, exception handling, analytics, and additional controls.
Click below to download the NetSuite P2P setup guide:

Check out our other NetSuite blogs for how-to guides and tips and visit our website to learn more about our NetSuite services and solutions.