Follow these steps to connect Tableau to NetSuite as an ODBC data source.
Important: Before you can connect NetSuite to Tableau, you need to download and install the latest version of the CData ODBC Driver for NetSuite. This article uses the 2016 CData ODBC Driver for NetSuite. Click here for the steps to set up the ODBC Driver.
Installing and Configuring Tableau
Download Tableau: https://www.tableau.com/products/trial
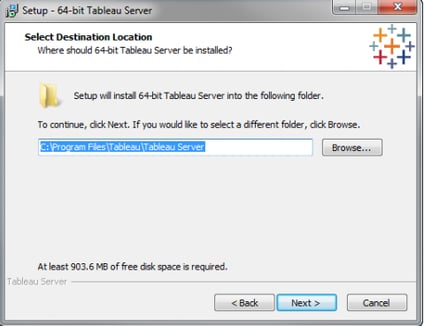
Running Server Setup
After you download the Tableau Server installation file, follow the instructions below to install the server.
Double-click the installation file. Follow the on-screen instructions to complete Setup and install the application.
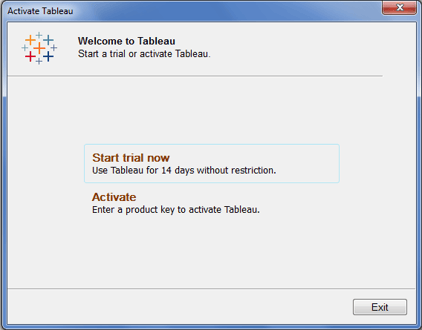
After installation is complete, select the Trial version:
Publish the NetSuite Data Source to Tableau Server
Provide connectivity to NetSuite data across the enterprise by creating a data source for NetSuite on Tableau Server. Users in your organization can create workbooks connected to the published data source.
Step 1
Click Connect to Data > More Servers > Other Databases (ODBC). Select CData NetSuite Source Sys, the system DSN.
The driver installation automatically creates a matching user and system DSNs: The system DSN is needed to connect from the Tableau Server.
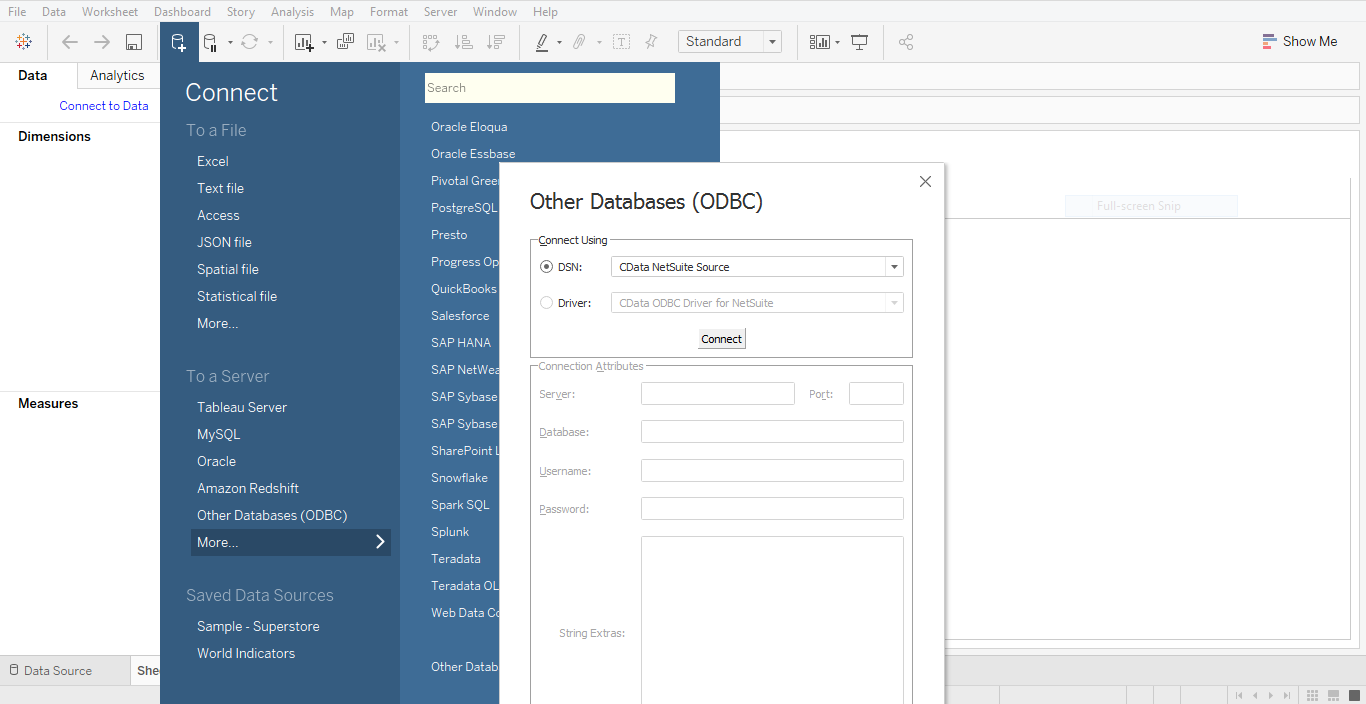
Step 2
In the Database menu, select CData.
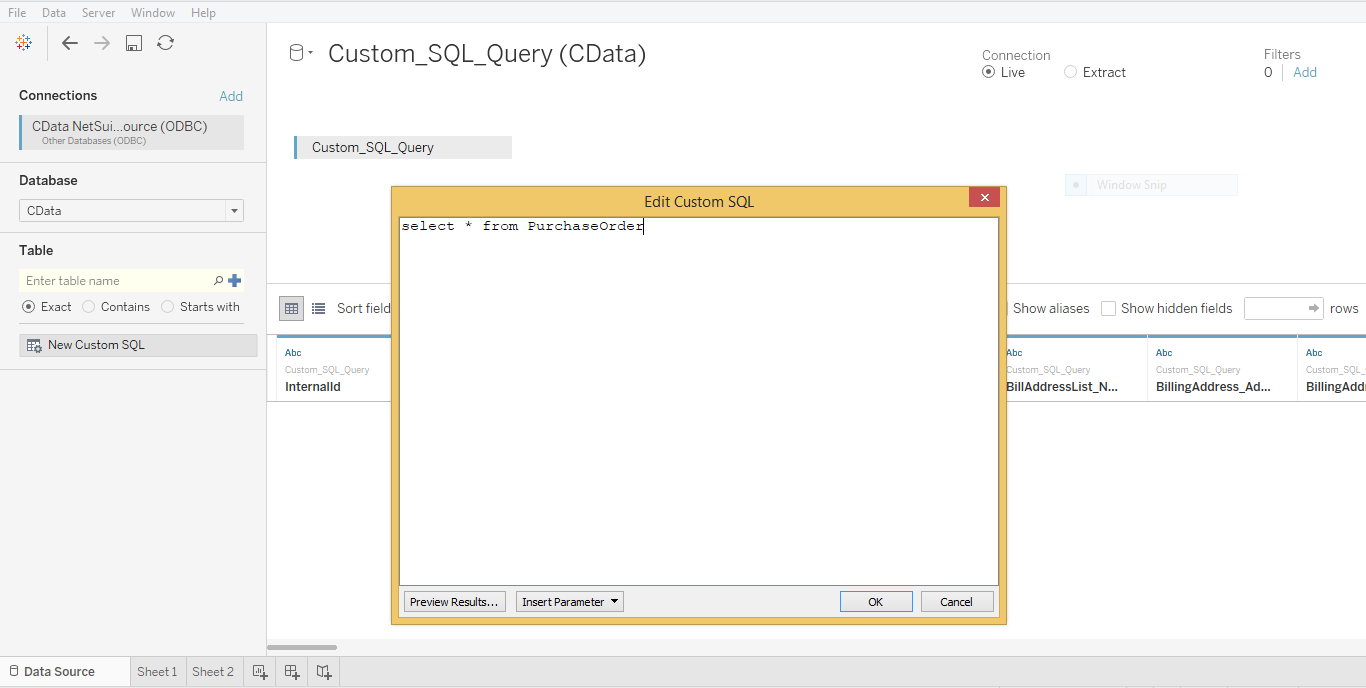
Step 3
In the Table box, enter a table name or click New Custom SQL to enter an SQL query. This article retrieves the Sales order table.
Step 4
Drag the table onto the join area.
Step 5
In the Connection menu, select the Extract option.
After executing the query and based on the table, the records are displayed.
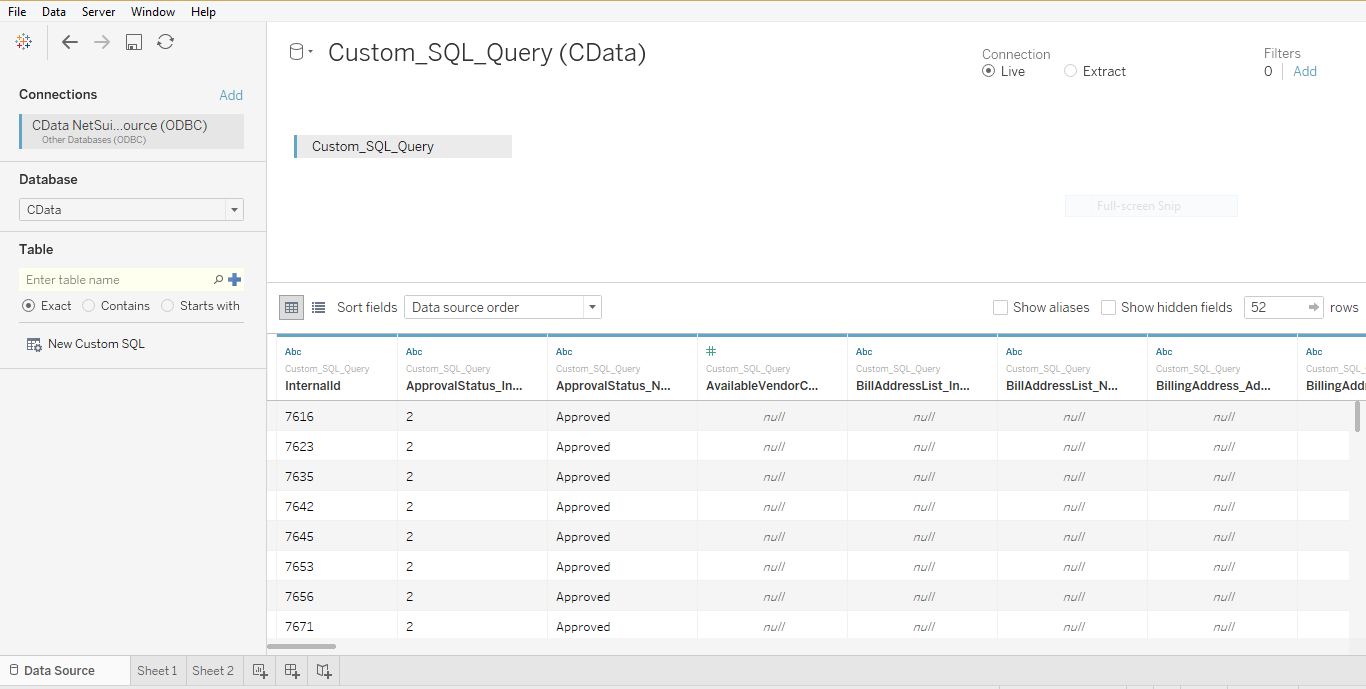
To generate a report, go through the sheets at the bottom of the page. The page opens with two sections:
- Dimensions: The record fields are displayed with their particular field internal IDs.
- Measures: Displays the summary fields with their particular field internal IDs.
The fields can be segregated based on the rows and columns.
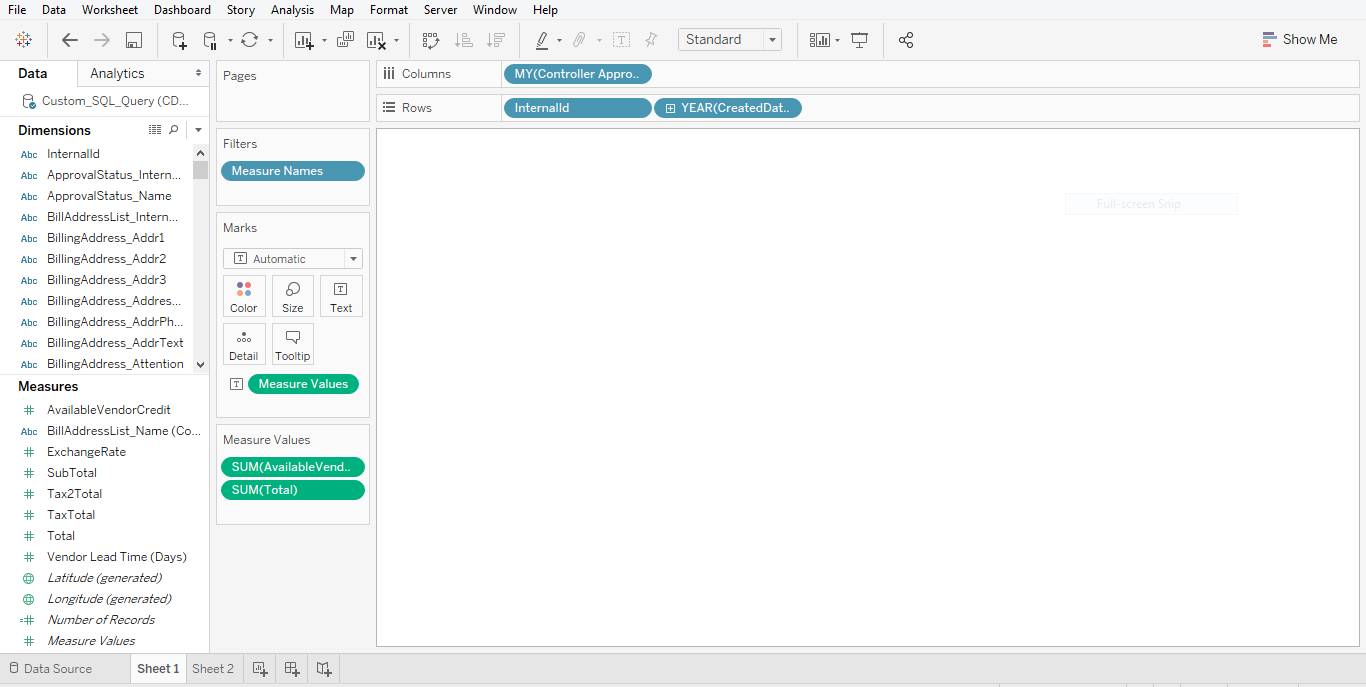
An example Purchase Order report that we can generate based on the fields:
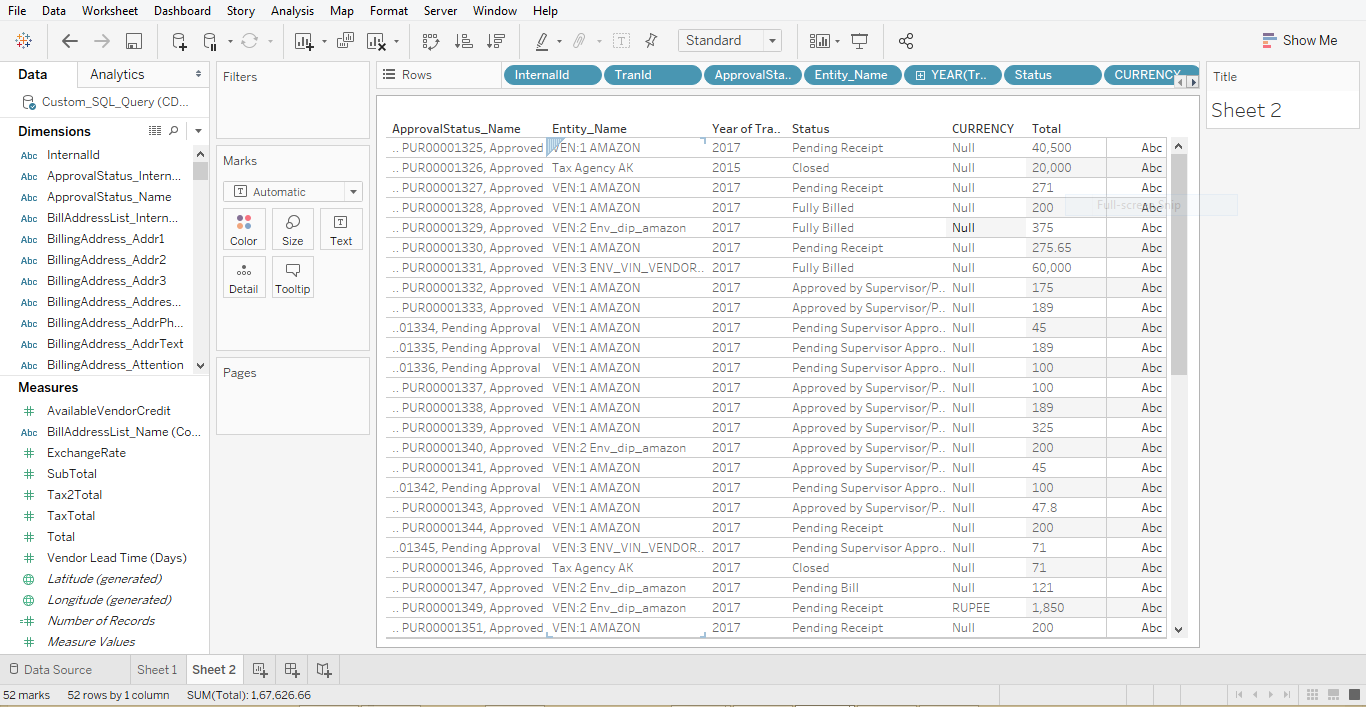
To view the NetSuite data, right-click under the table name in the Data section of the dashboard and select the View Data option. The NetSuite data will appear in Tableau.
Check out our other NetSuite blogs for how-to guides, tips and other NetSuite solutions. Contact us to discuss your challenges.