Steps to integrate Salesforce Customers with NetSuite Accounts using Dell Boomi.
Don’t have time? Read it later:

Part I — Dell Boomi
Step 1
Log into Dell Boomi with your username and password.
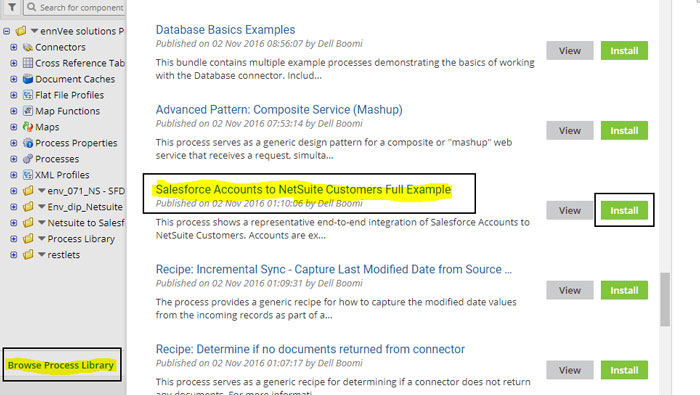
Step 2
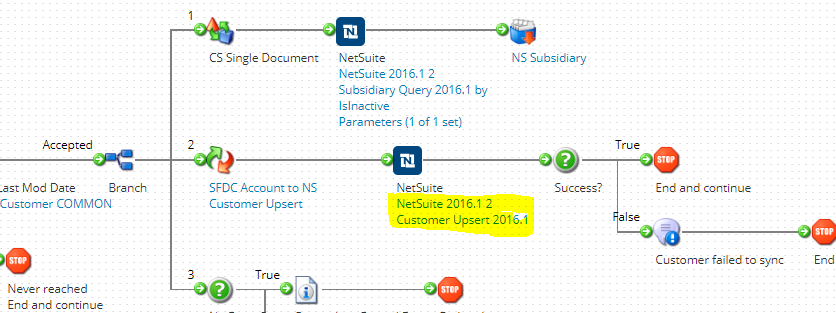
Click Browse Process Library in the Boomi Window > Select Salesforce Accounts to NetSuite Customer Full Example > Click Install.
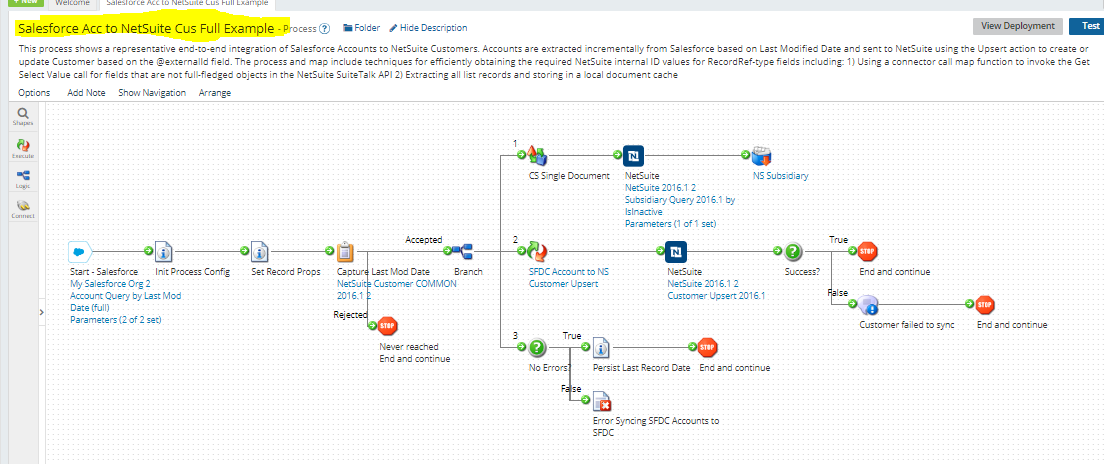
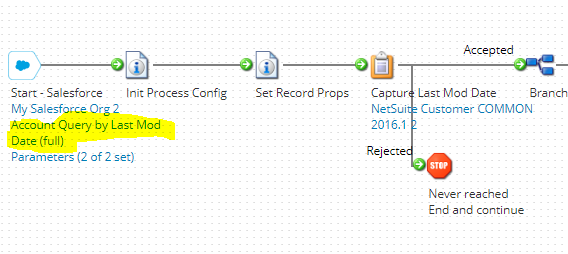
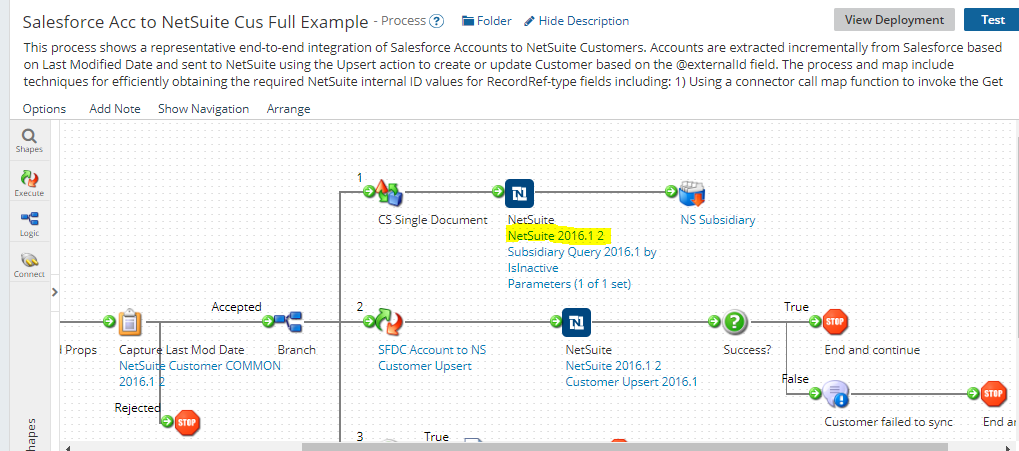
The example looks like this:
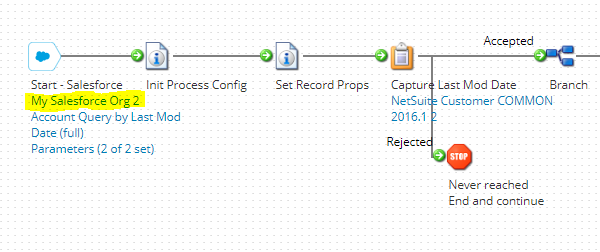
Step 3
Click Start - Salesforce Org > Enter your Salesforce credentials
(User Name and Password) > Save and Close.
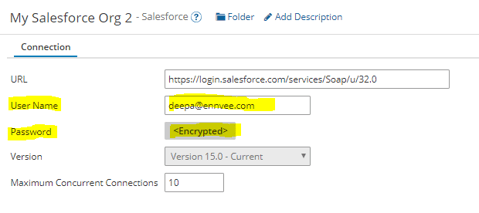
Note: You have to enter the Salesforce password along with the Token ID.
Example: SalesforceTokenID (Generated from salesforce account).
Step 4
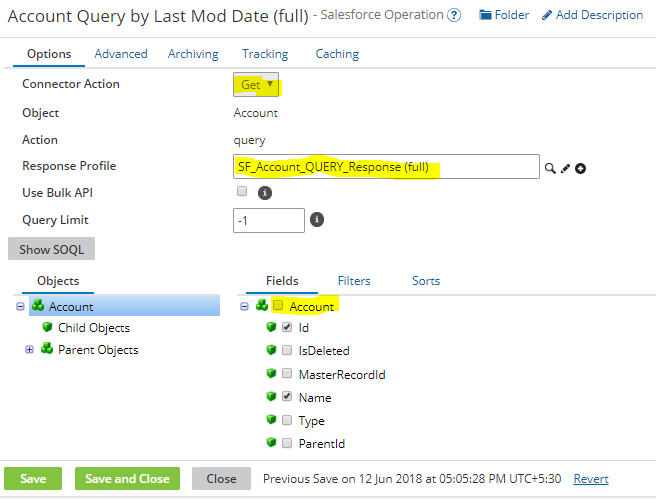
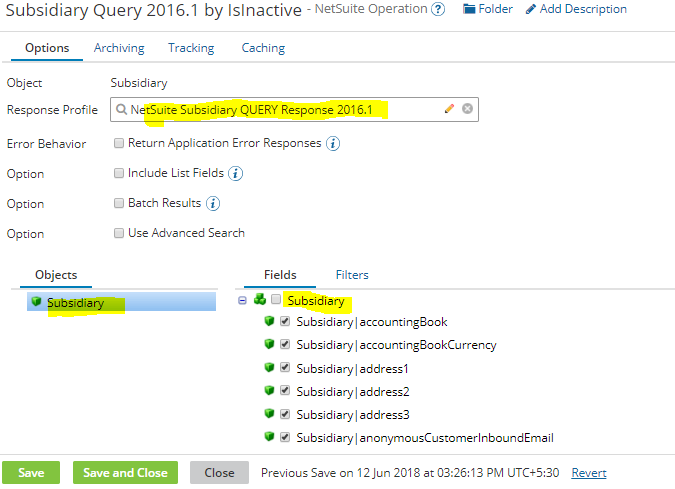
Click Account Query (here, we will add the parameters we are passing on to NetSuite).
Step 5
Select the required fields that we need to map data from Salesforce to NetSuite.
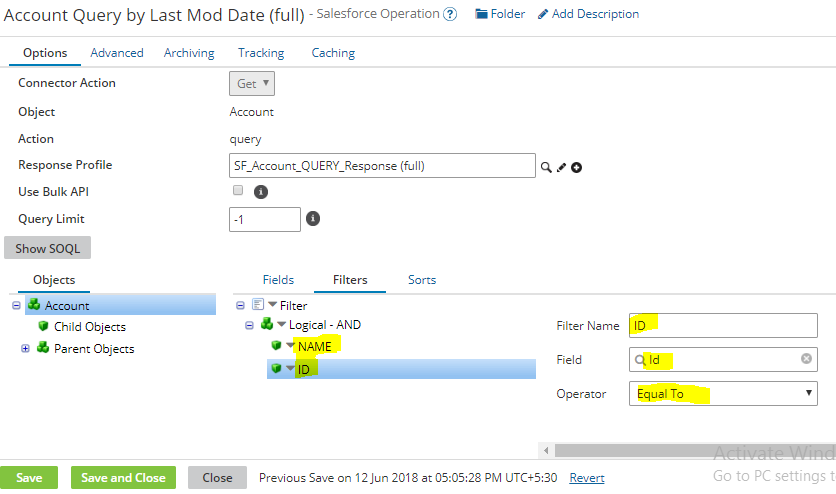
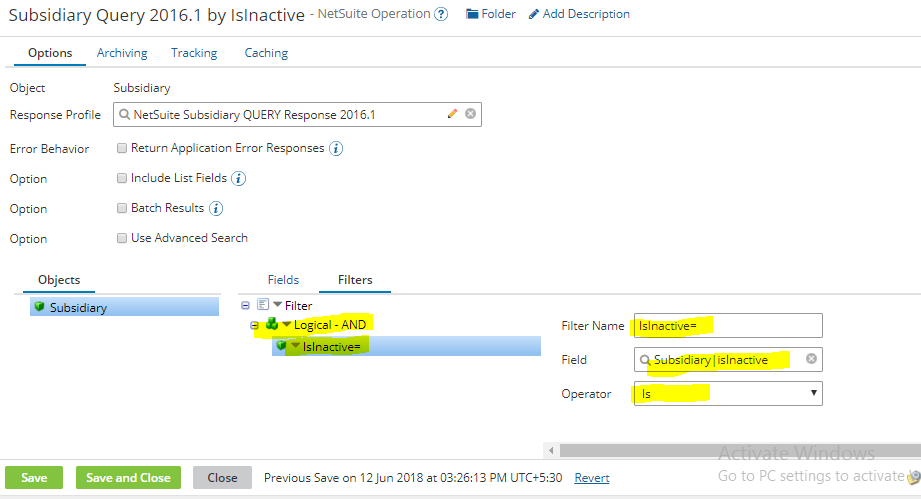
Step 6
Click Filters to do AND operations with the respective parameter (here, I will take Name and ID), and select the operator for those parameters > Save and Close.
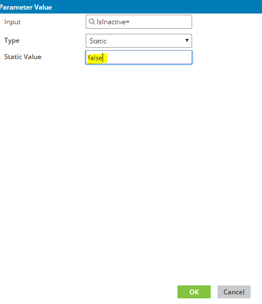
Step 7
Click on Parameter > Assign parameters with value.
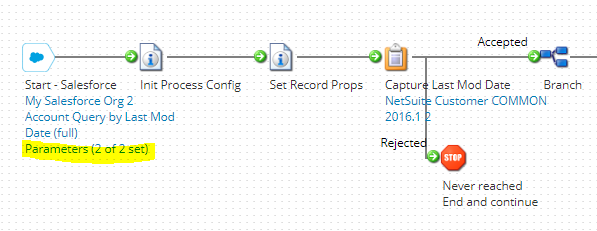
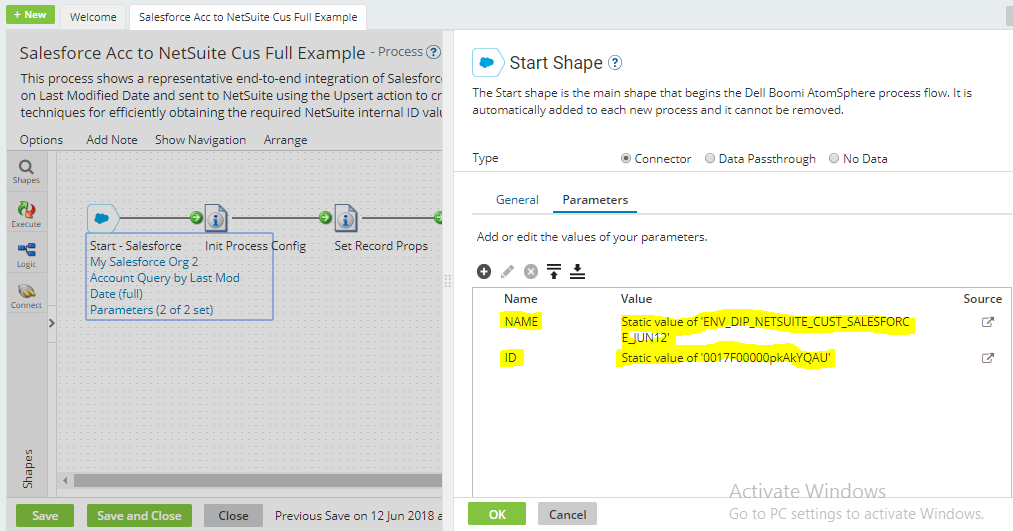
Note: ID is generated from the Salesforce account.
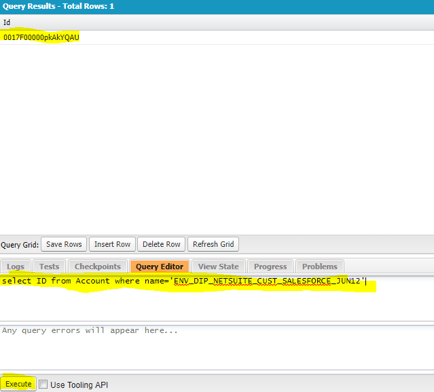
How to fetch the ID:
- Log into the Salesforce Account
- Click on Developer Console (one window will visible)
- Write a query on there (select ID from Account where name='ENV_DIP_NETSUITE_CUST_SALESFORCE_JUN12' )
- Click on execute.
- ID will generate (take ID from the account and put it into Dell Boomi account).
- Click OK and save.
Step 8
Click on NetSuite
- Enter the User Name, Password, Token ID, Account ID, Consumer Key, Consumer Secret, Token Secret, Application ID, and Version.
- Click Save and Test the connections.
- Once the test is successful, click Save and Close.
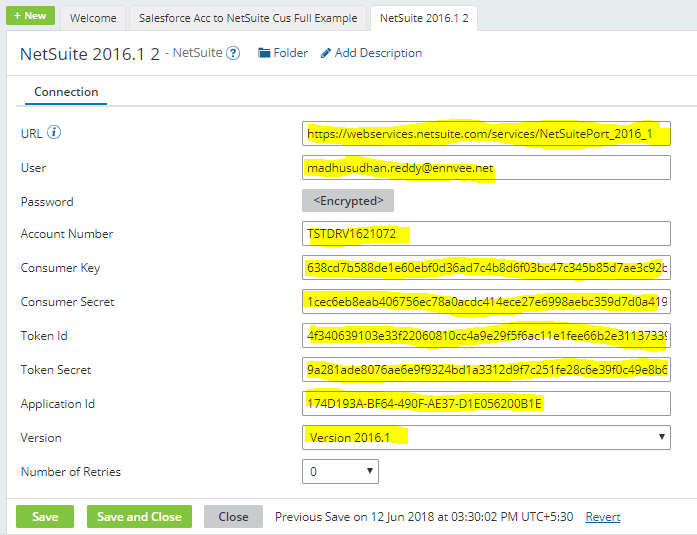
Note: Here, the URL and Version should be the same.
Step 9
Click Subsidiary and assign values to it.
Step 10
In the subsidiary part, select Filters and assign a Filter and Operator to it > Save and Close.
Step 11
Assign parameter to the subsidiary.
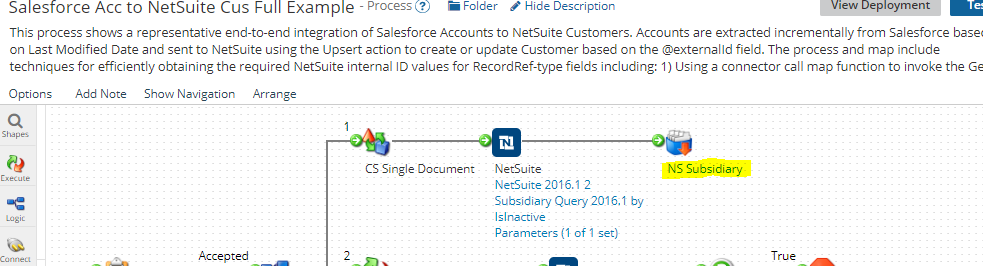
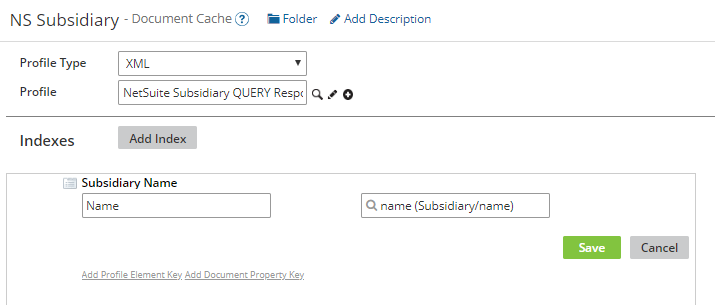
Step 12
Click on NS Subsidiary and check the parameter.
Step 13
Click on SFDC Account to NS > Map all of the data from Salesforce to NetSuite.
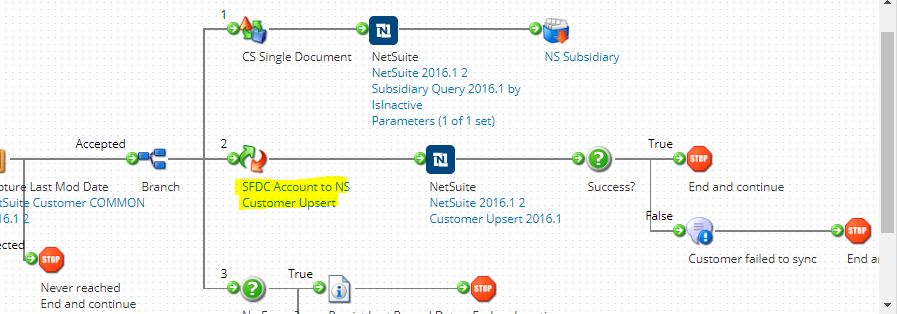
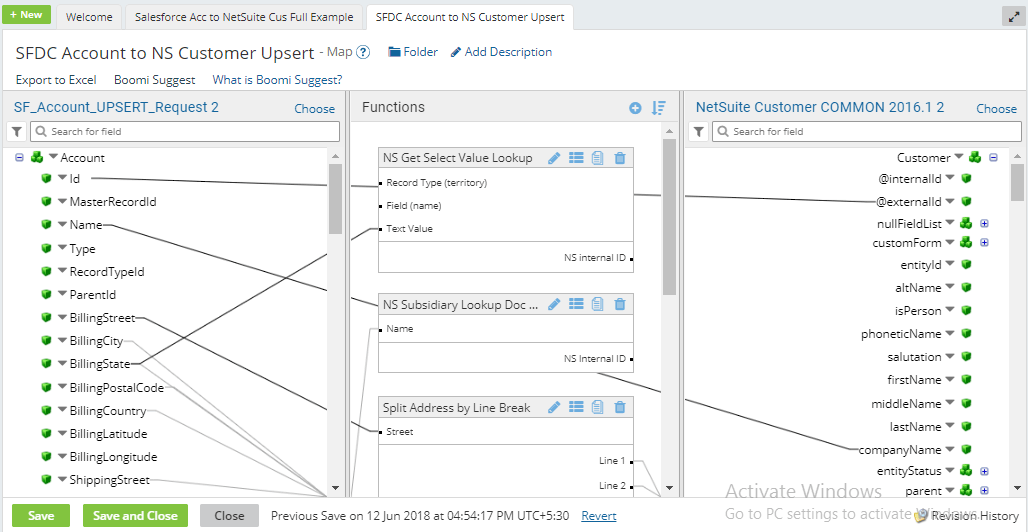
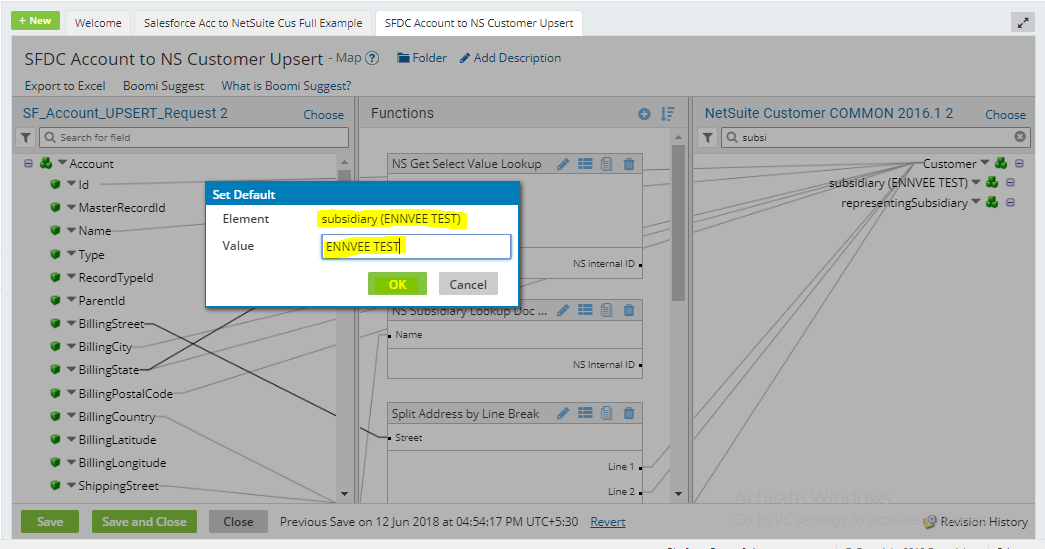
Set the Subsidiary value wherein you want to pull data from Salesforce to NetSuite > Save and Close.
Step 14
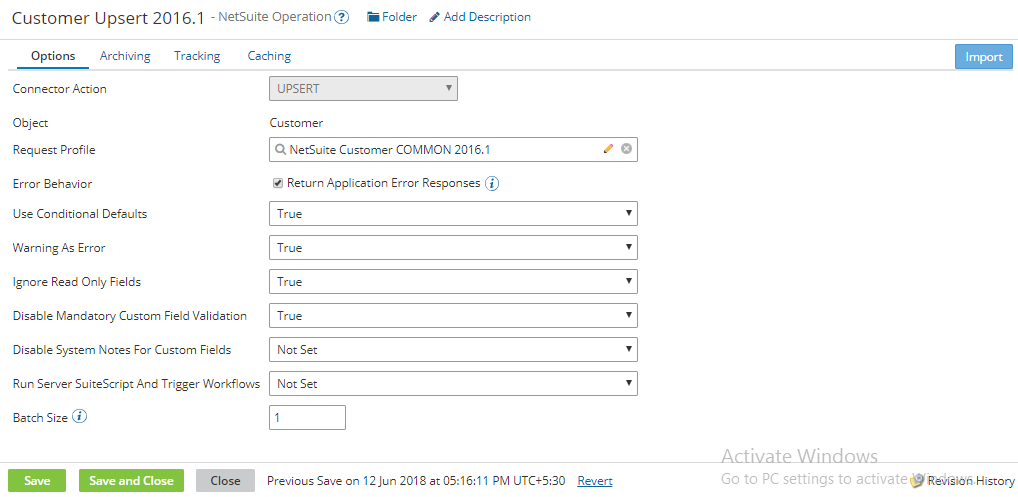
Click on NetSuite and assign credentials to it.
Click Customer Upsert and fill all data as required.
Step 15
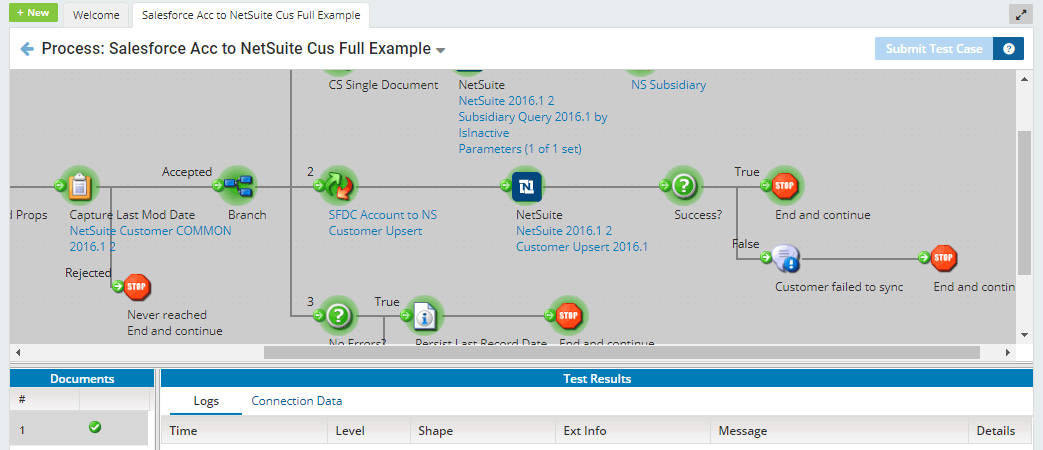
Click Save and Test data (a successful message will display) > check the NetSuite Customer List Page (data has been generated).
Input (Salesforce Account Data):
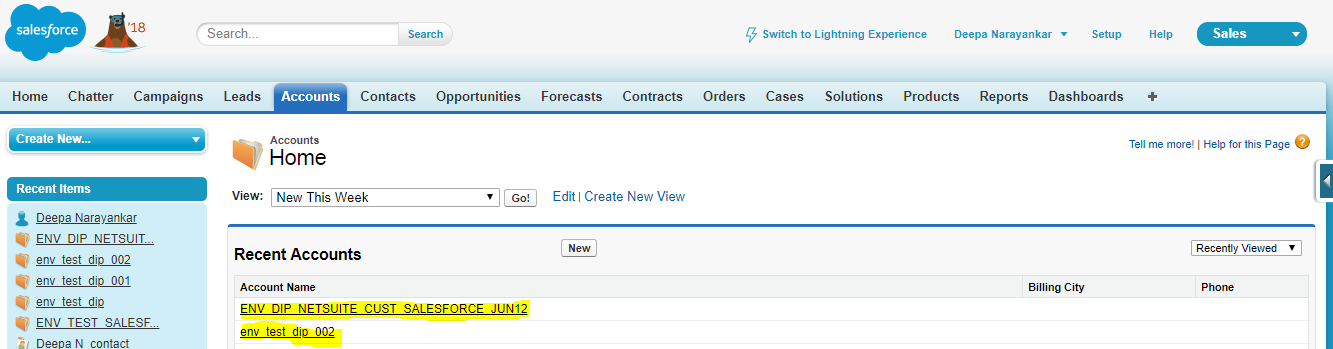
Output (Salesforce Account Data):

Part II — Creating Multiple Records at a Time
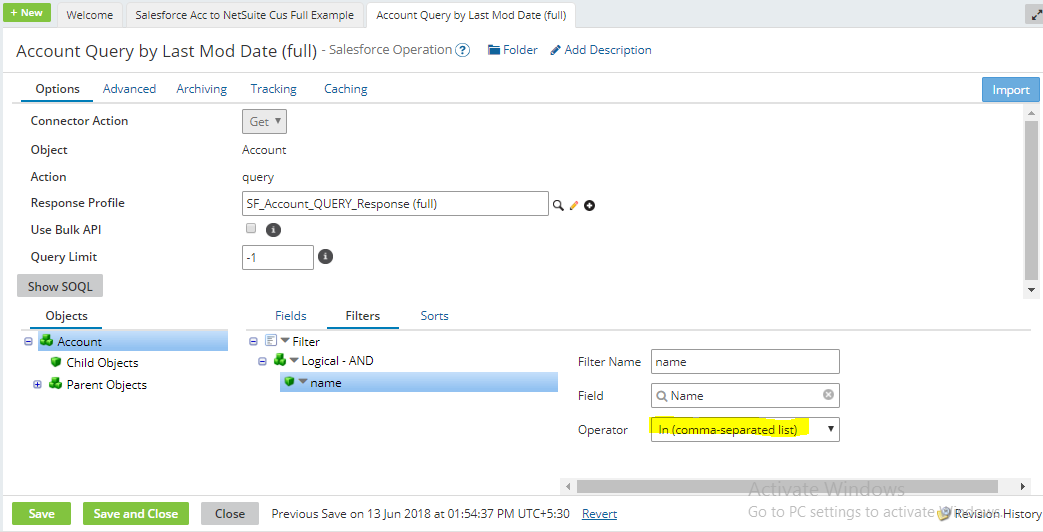
Step 1
Go to the Account Query link > Select operator (in a comma-separated list) > Save and Close.
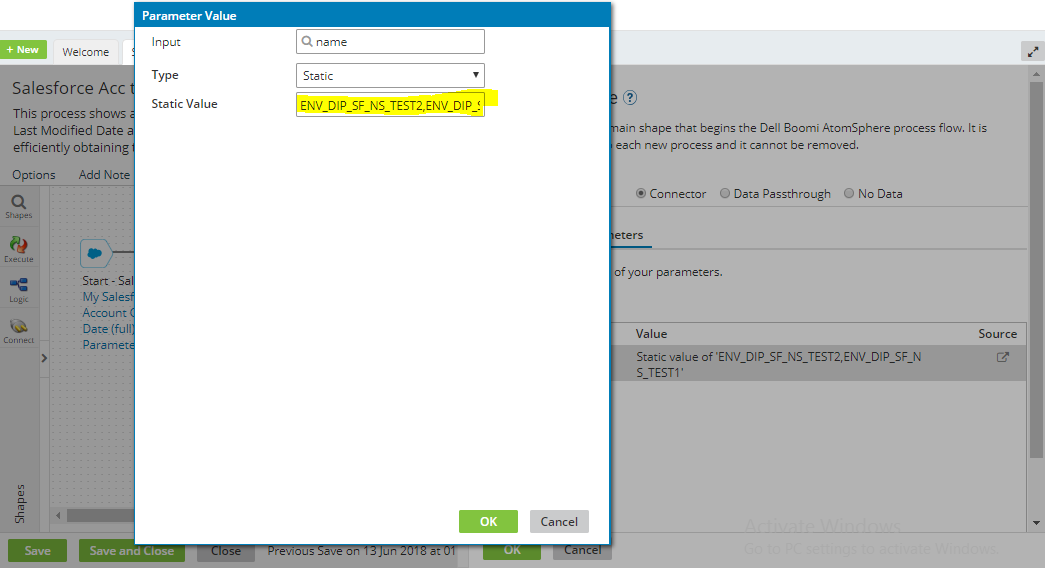
Step 2
Go to parameter link > Select Name > Assign 2 or 3 Name of Account (Salesforce Account) > Save and Close.
Step 3
Save and Test the data > Multiple records will be created in the NetSuite account.
Download the complete guide here:
Check out our other NetSuite blogs for how-to guides and tips. ennVee also offers Order to Cash, Procure to Pay, and other NetSuite solutions. Contact us to discuss your challenges.