Integrating the data between disparate systems helps you avoid data quality issues and duplicate entries. This article highlights how to properly integrate NetSuite Customers into Salesforce Accounts using Dell Boomi as the integration tool.

Steps
Don’t have time? Read it later:

Part I — Dell Boomi
Step 1
Log into Dell Boomi with your username and password.
Step 2
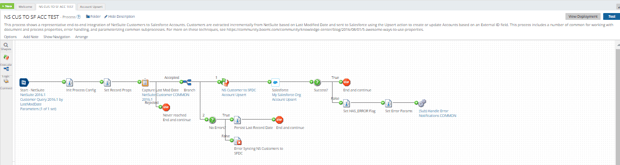
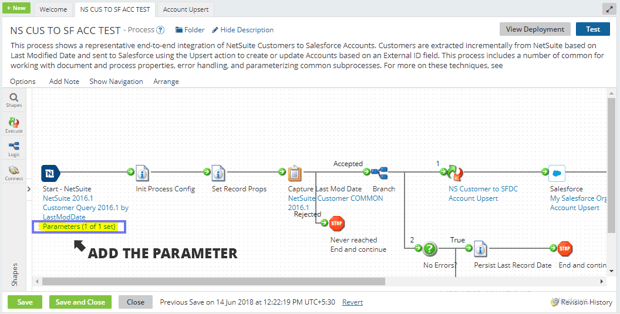
Click Browse Process Library in the Boomi Window > Select NetSuite to Salesforce Integration > Install.
Step 3
The example looks like this:
Step 4
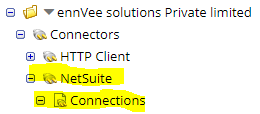
Click the respective bundle folder > select NetSuite > select Connections.
Step 5
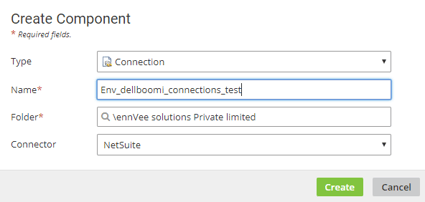
Select New and Create a new connection.
Step 6
Enter the following information:
- URL
- User
- Password
- Account Number
- Consumer Key
- Consumer Secret
- Token ID
- Token Secret
- Application ID
Click the Save button.

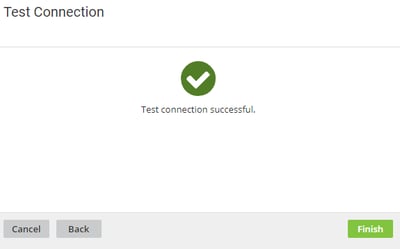
Step 7
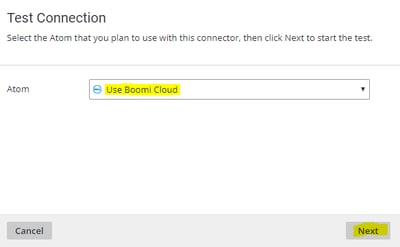
Click the Test Connection button and a pop-up window will appear > select Use Boomi Cloud > Click Next.
How to Re-generate a Consumer Key and Consumer Secret:
- Go to Setup > Integration > Integration Management > Manage Integrations (Administrator).
- Select the record for which you want to generate a new consumer key and secret.
- The record opens in view mode.
- Click the Edit button.
- Click the Reset Credentials button. The system displays a popup message asking if you are sure you want to reset the credentials.
- Click OK. The system resets the credentials. The record is shown again in view mode, with the new consumer key and secret displayed.
How to Re-generate a Token ID and Secret
- Go to Setup > Integration > Integration Management > Manage Integrations > New (Administrator).
- Enter a Name for your application.
- Enter a Description, if desired.
- The application State is Enabled by default. Another option available for selection is Blocked.
- Enter a note, if desired.
- Check the Token-based Authentication box on the Authentication subtab.
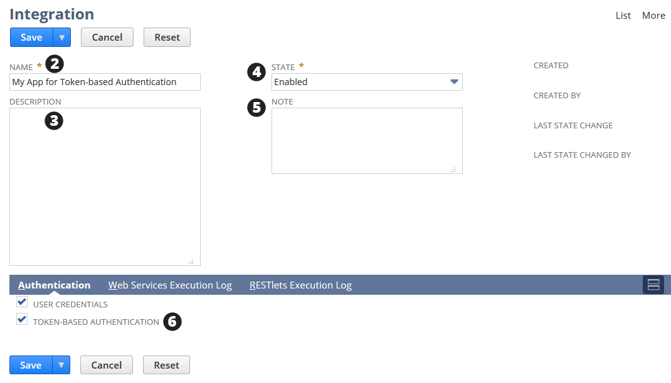
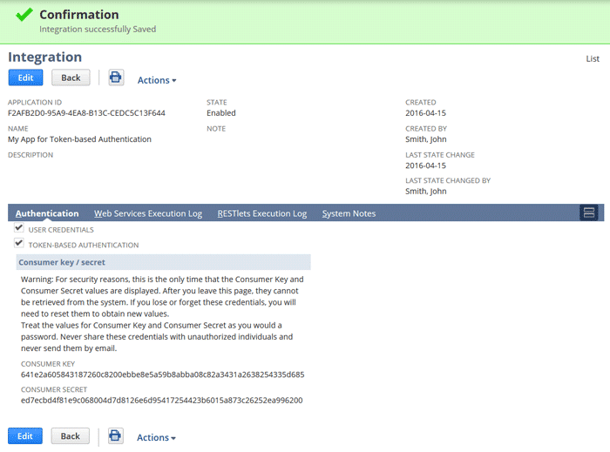
- Click Save. The confirmation page displays the Consumer Key and Consumer Secret for this application.
- Create a new customer in the NetSuite account.
Example: Env_dip_NS_To_SF_Test_June14th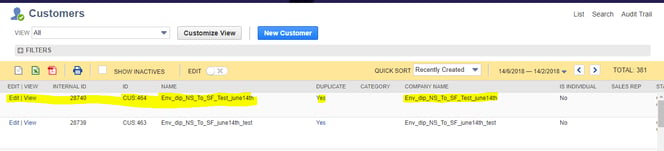
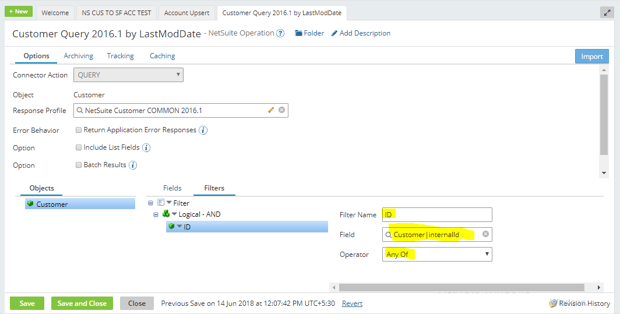
- Select the field that you want to add in the Salesforce account.
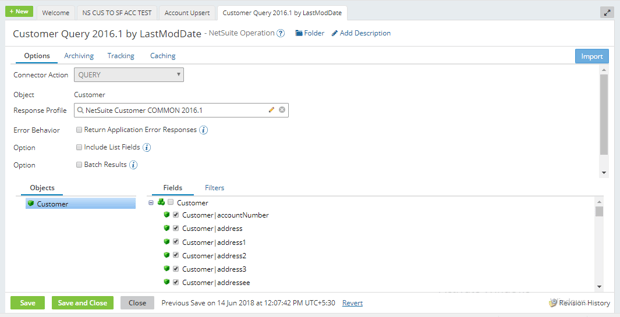
- Add the parameter (the internal ID of the NetSuite customer) and select the operator for that parameter.
 Example: 28740
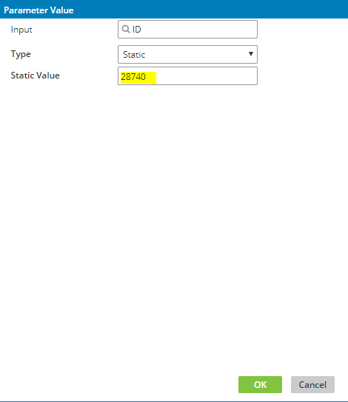
Click OK > Save and Close.
Part II — Salesforce
Step 1
Enter your Salesforce credentials (User Name and Password) > click Save.
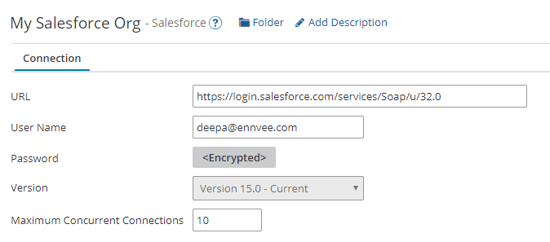
NOTE: For the Salesforce account password you need to enter a password with a Token ID, which is generated from the Salesforce account.
Step 2
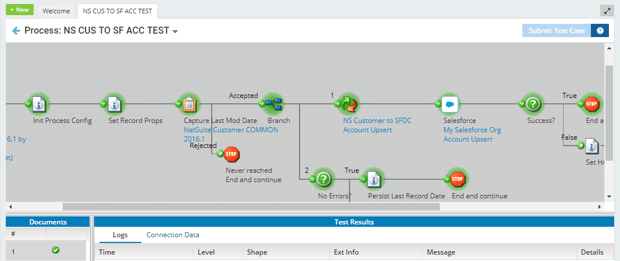
Select mapping function > Click NS Customer to SFDC.
 Enter Account upsert data. Mapping data refers to NetSuite customer fields with Salesforce Account fields.
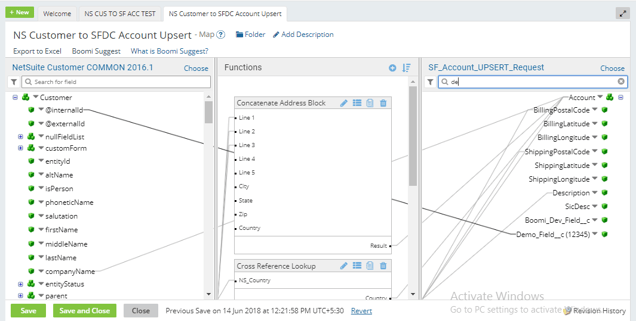
NOTE: In Salesforce, Account means Customer.
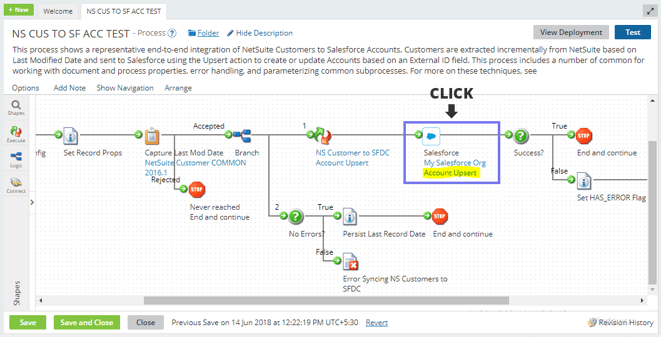
Step 3
Click Account Upsert and set the external ID.
To set a value for Demo_Field_cc, right-click on Demo_Field_cc and enter any value. Demo_Field_cc can be found in the External ID field (pictured below).
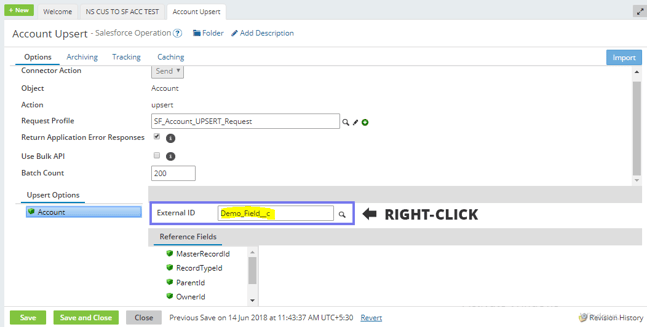
NOTE: To create the Demo_field in the Salesforce account, go to the Salesforce account, click the Account tab, create a new custom field, and save.

Step 4
Click Save and test the data.
Step 5
Open the Salesforce account and check the data.

How to Create Multiple Records in Salesforce
Step 1
Go to Parameter > click ID > assign an ID with a comma (',')
An example is shown in the image below in the Static Value field: 25684,25685,25686
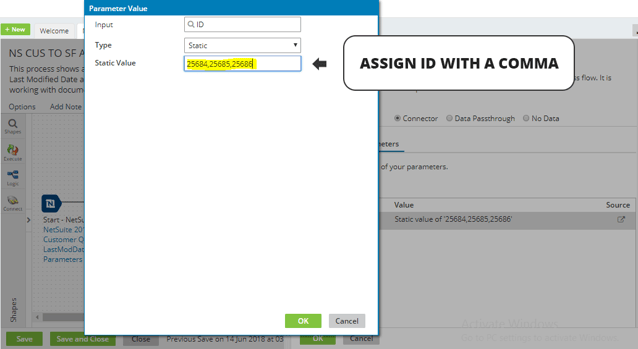
Step 2
Click OK and Save.
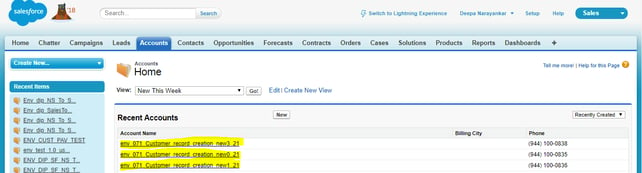
Step 3
Test the data and check the Salesforce account.
And you're done.
Click below to download a copy of the NetSuite-Salesforce integration guide:
Check out our other NetSuite blogs for how-to guides, tips and other NetSuite solutions. Contact us to discuss your challenges.